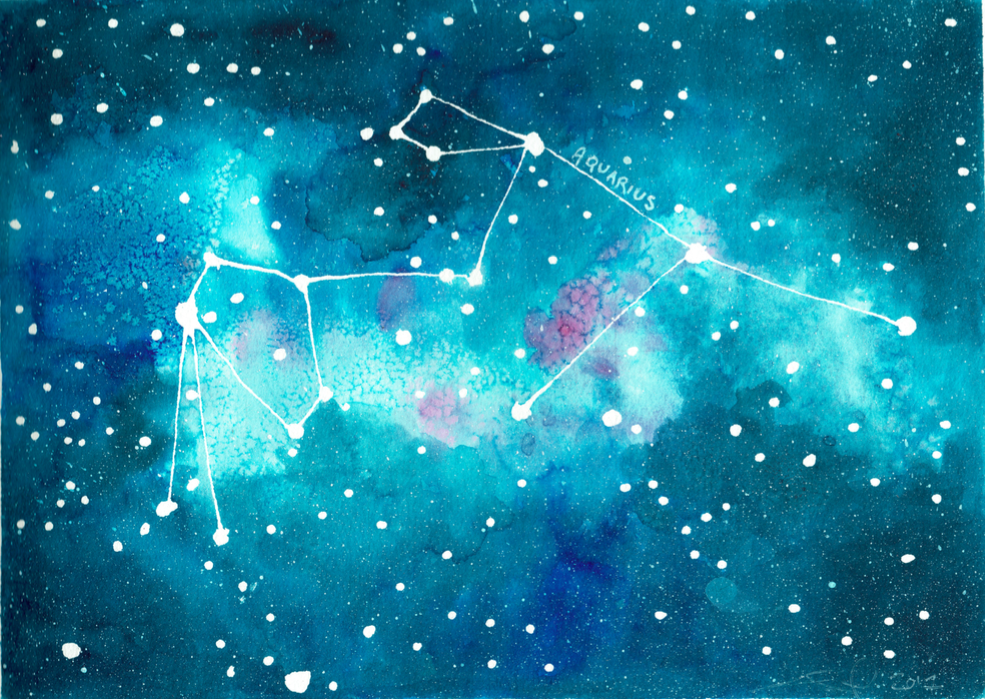
There has been a lot of interest in the creative process behind my constellation maps. Admittedly, I did not come up with the original concept of a constellation map myself - it was a challenging, yet welcome commission from a friend. I love a challenge.
The process, however, is my own – careful planning combined with a throwing-spaghetti-at-the-wall approach resulting in happy accidents. Watercolor is always somewhat, if not entirely, accidental. There are a lot of life lessons in this particular painting medium which I will save for another blog.
For now, here’s a step-by-step guide to making your own constellation map.
NOTE: Every part of this process is open to interpretation and manipulation. I encourage play and experimentation and it certainly doesn’t need to be technically ‘correct’. It's art. Everything is optional.
ANOTHER NOTE: This will take some time, a lot of it is down time. Don't be too anxious for things to dry. It can be a leisurely process you come back to throughout the day.
WHAT YOU NEED:

140lb or greater watercolor paper (I like Strathmore 400 series but anything that’s thick enough to withstand a little drenching is good)
Tape (artist tape if you have it)
Pencil
Eraser
Fineline Masking fluid
Ruler
Watercolor paints (a few different blues if you have them and a red)
Watercolor brush(es)
Salt (fine and rock)
White ink
Toothbrush (that you never want to use again)
White ink pen
Printed copy of constellation
Foam brush
Water
STEP ONE:
Find the constellation(s) you’d like to paint using Google image or this helpful Constellation Guide.
Print it out.
NOTE: If you want to do a section of the map, take a screenshot and print that out. It’s also helpful to format it into simple, whole dimensions like 8”x10” for when you do your grid work.

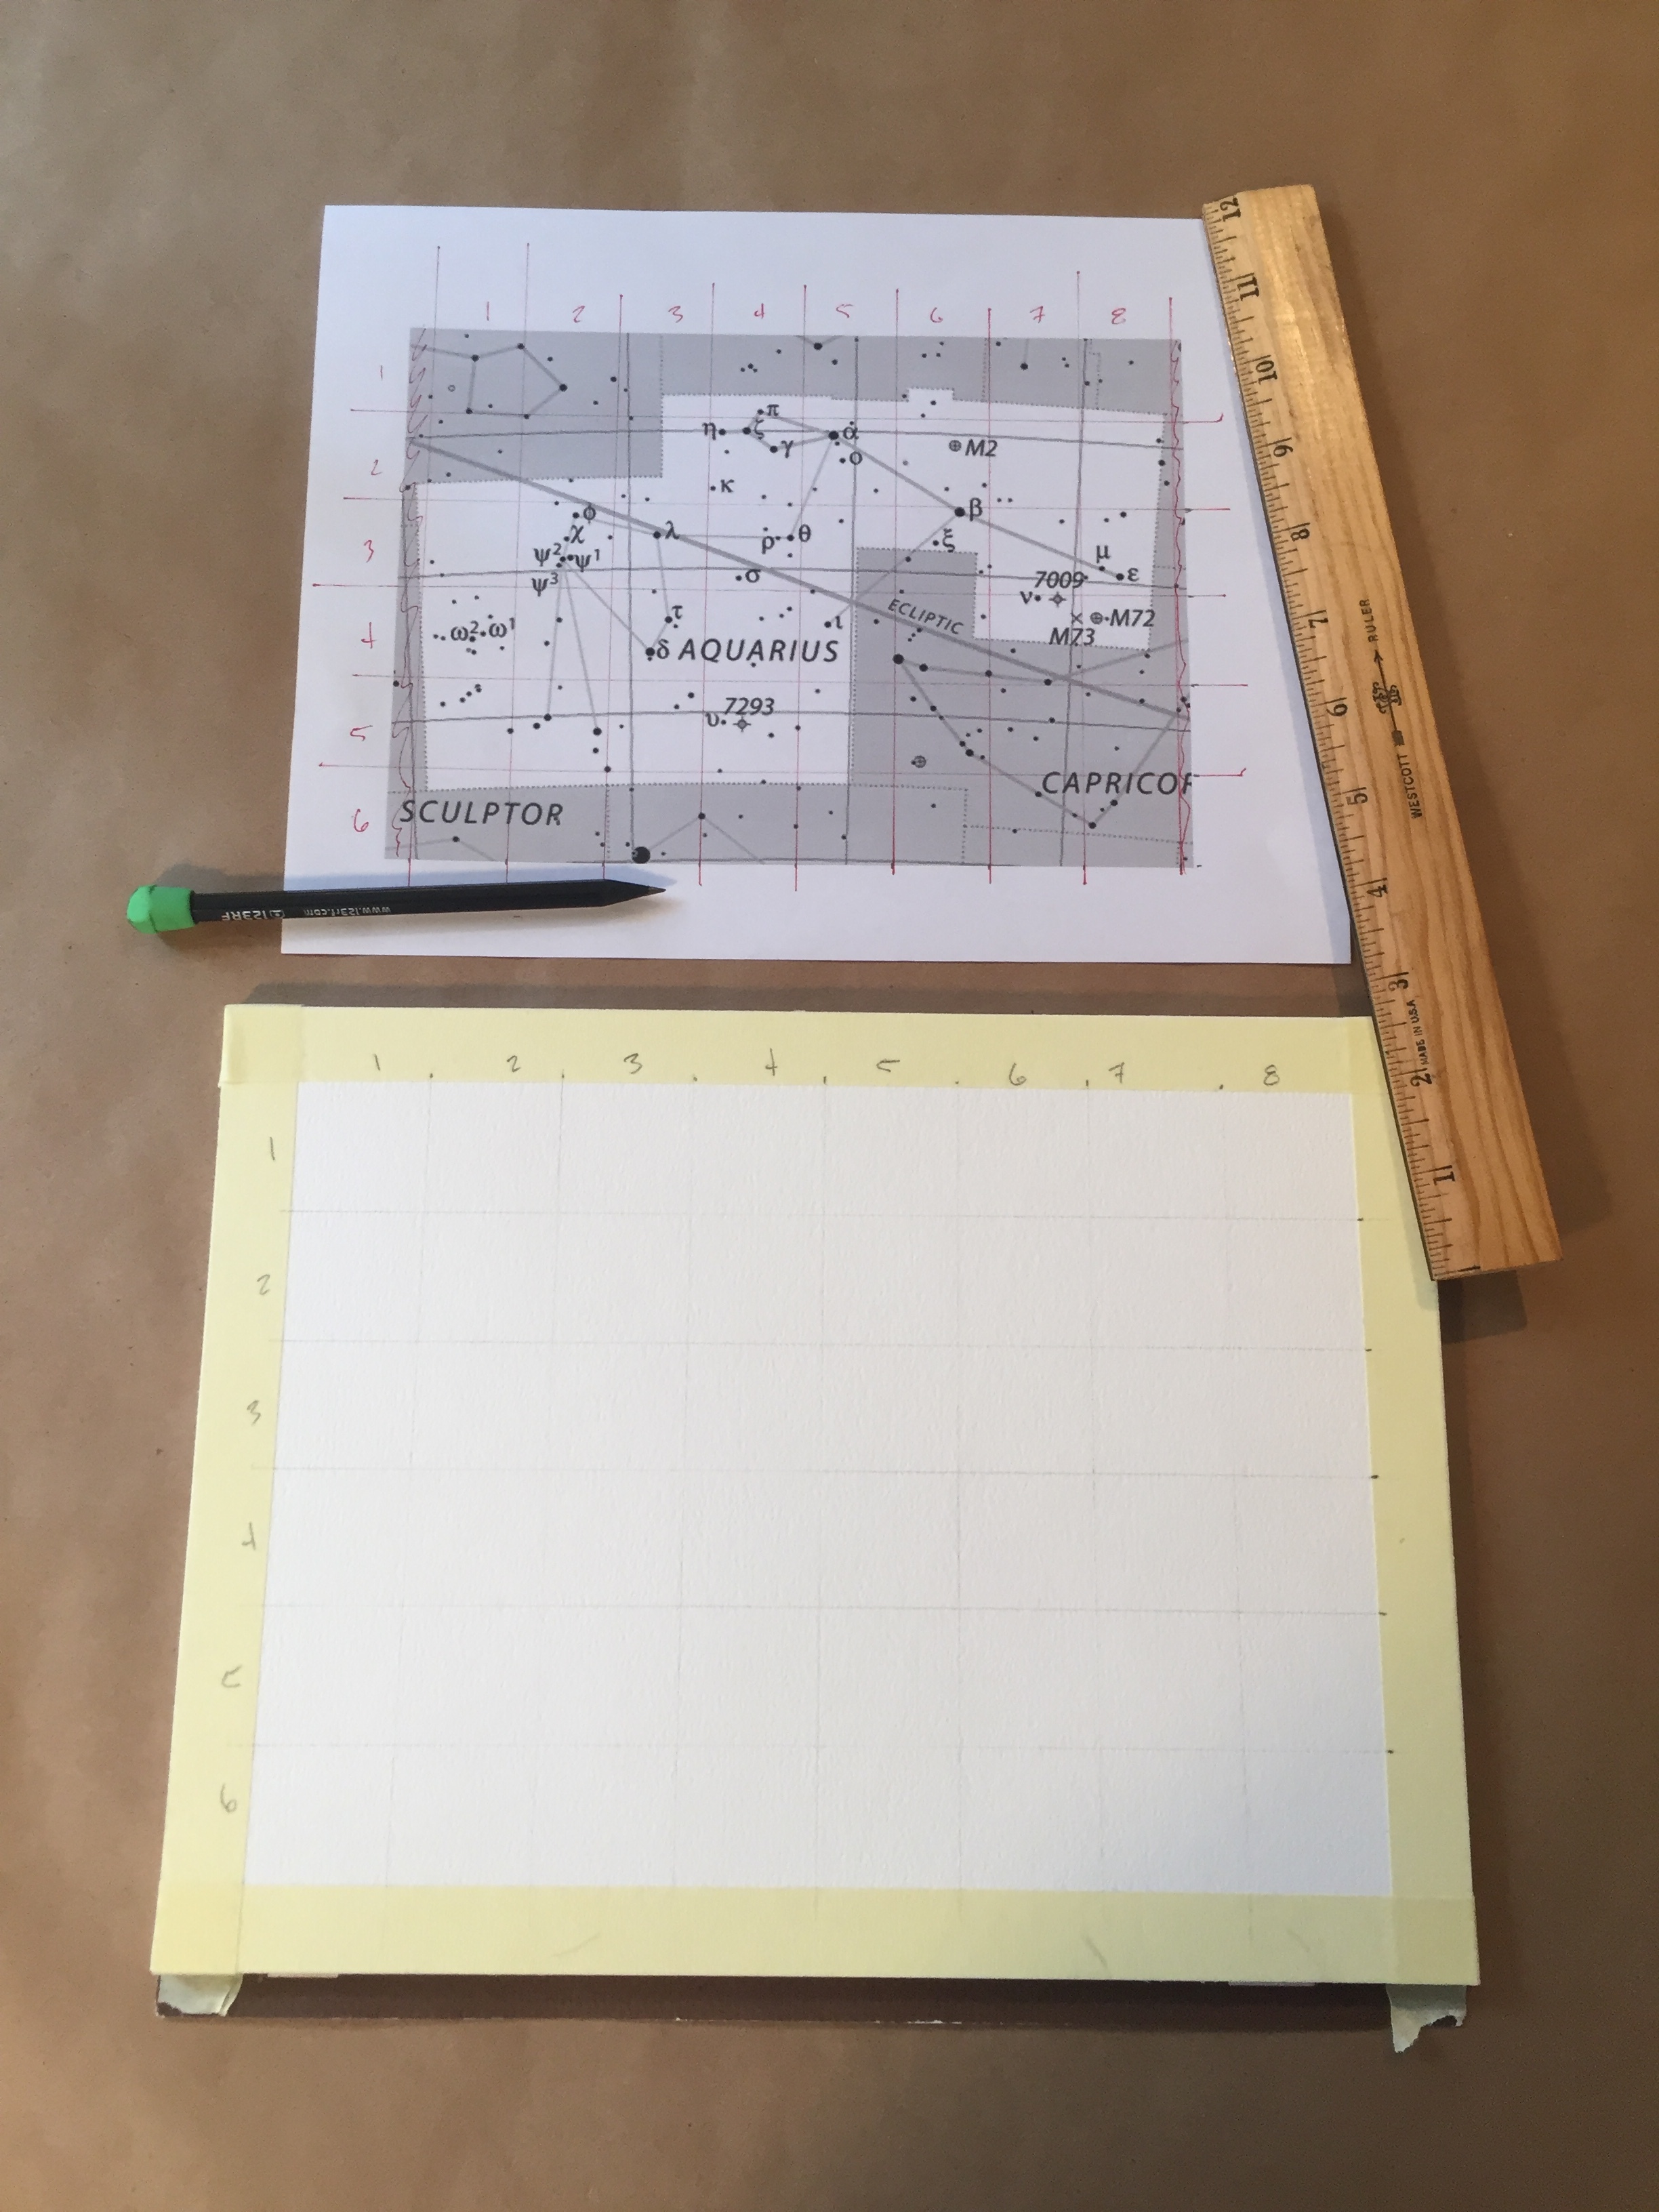
STEP TWO:
Tape a border around your paper (you may want to measure before you do this). If you are not using a watercolor block, you should tape the paper onto a larger board or table to stabilize it.
Using your ruler and a pencil, measure and draw matching grids on your paper and the constellation print.
NOTE: I used a red pen on the print out so it’s easier to see. Use a sharp pencil on the watercolor paper and don’t press too hard.
STEP THREE:
Using the Fineline masking fluid, carefully ‘draw’ out your constellation.
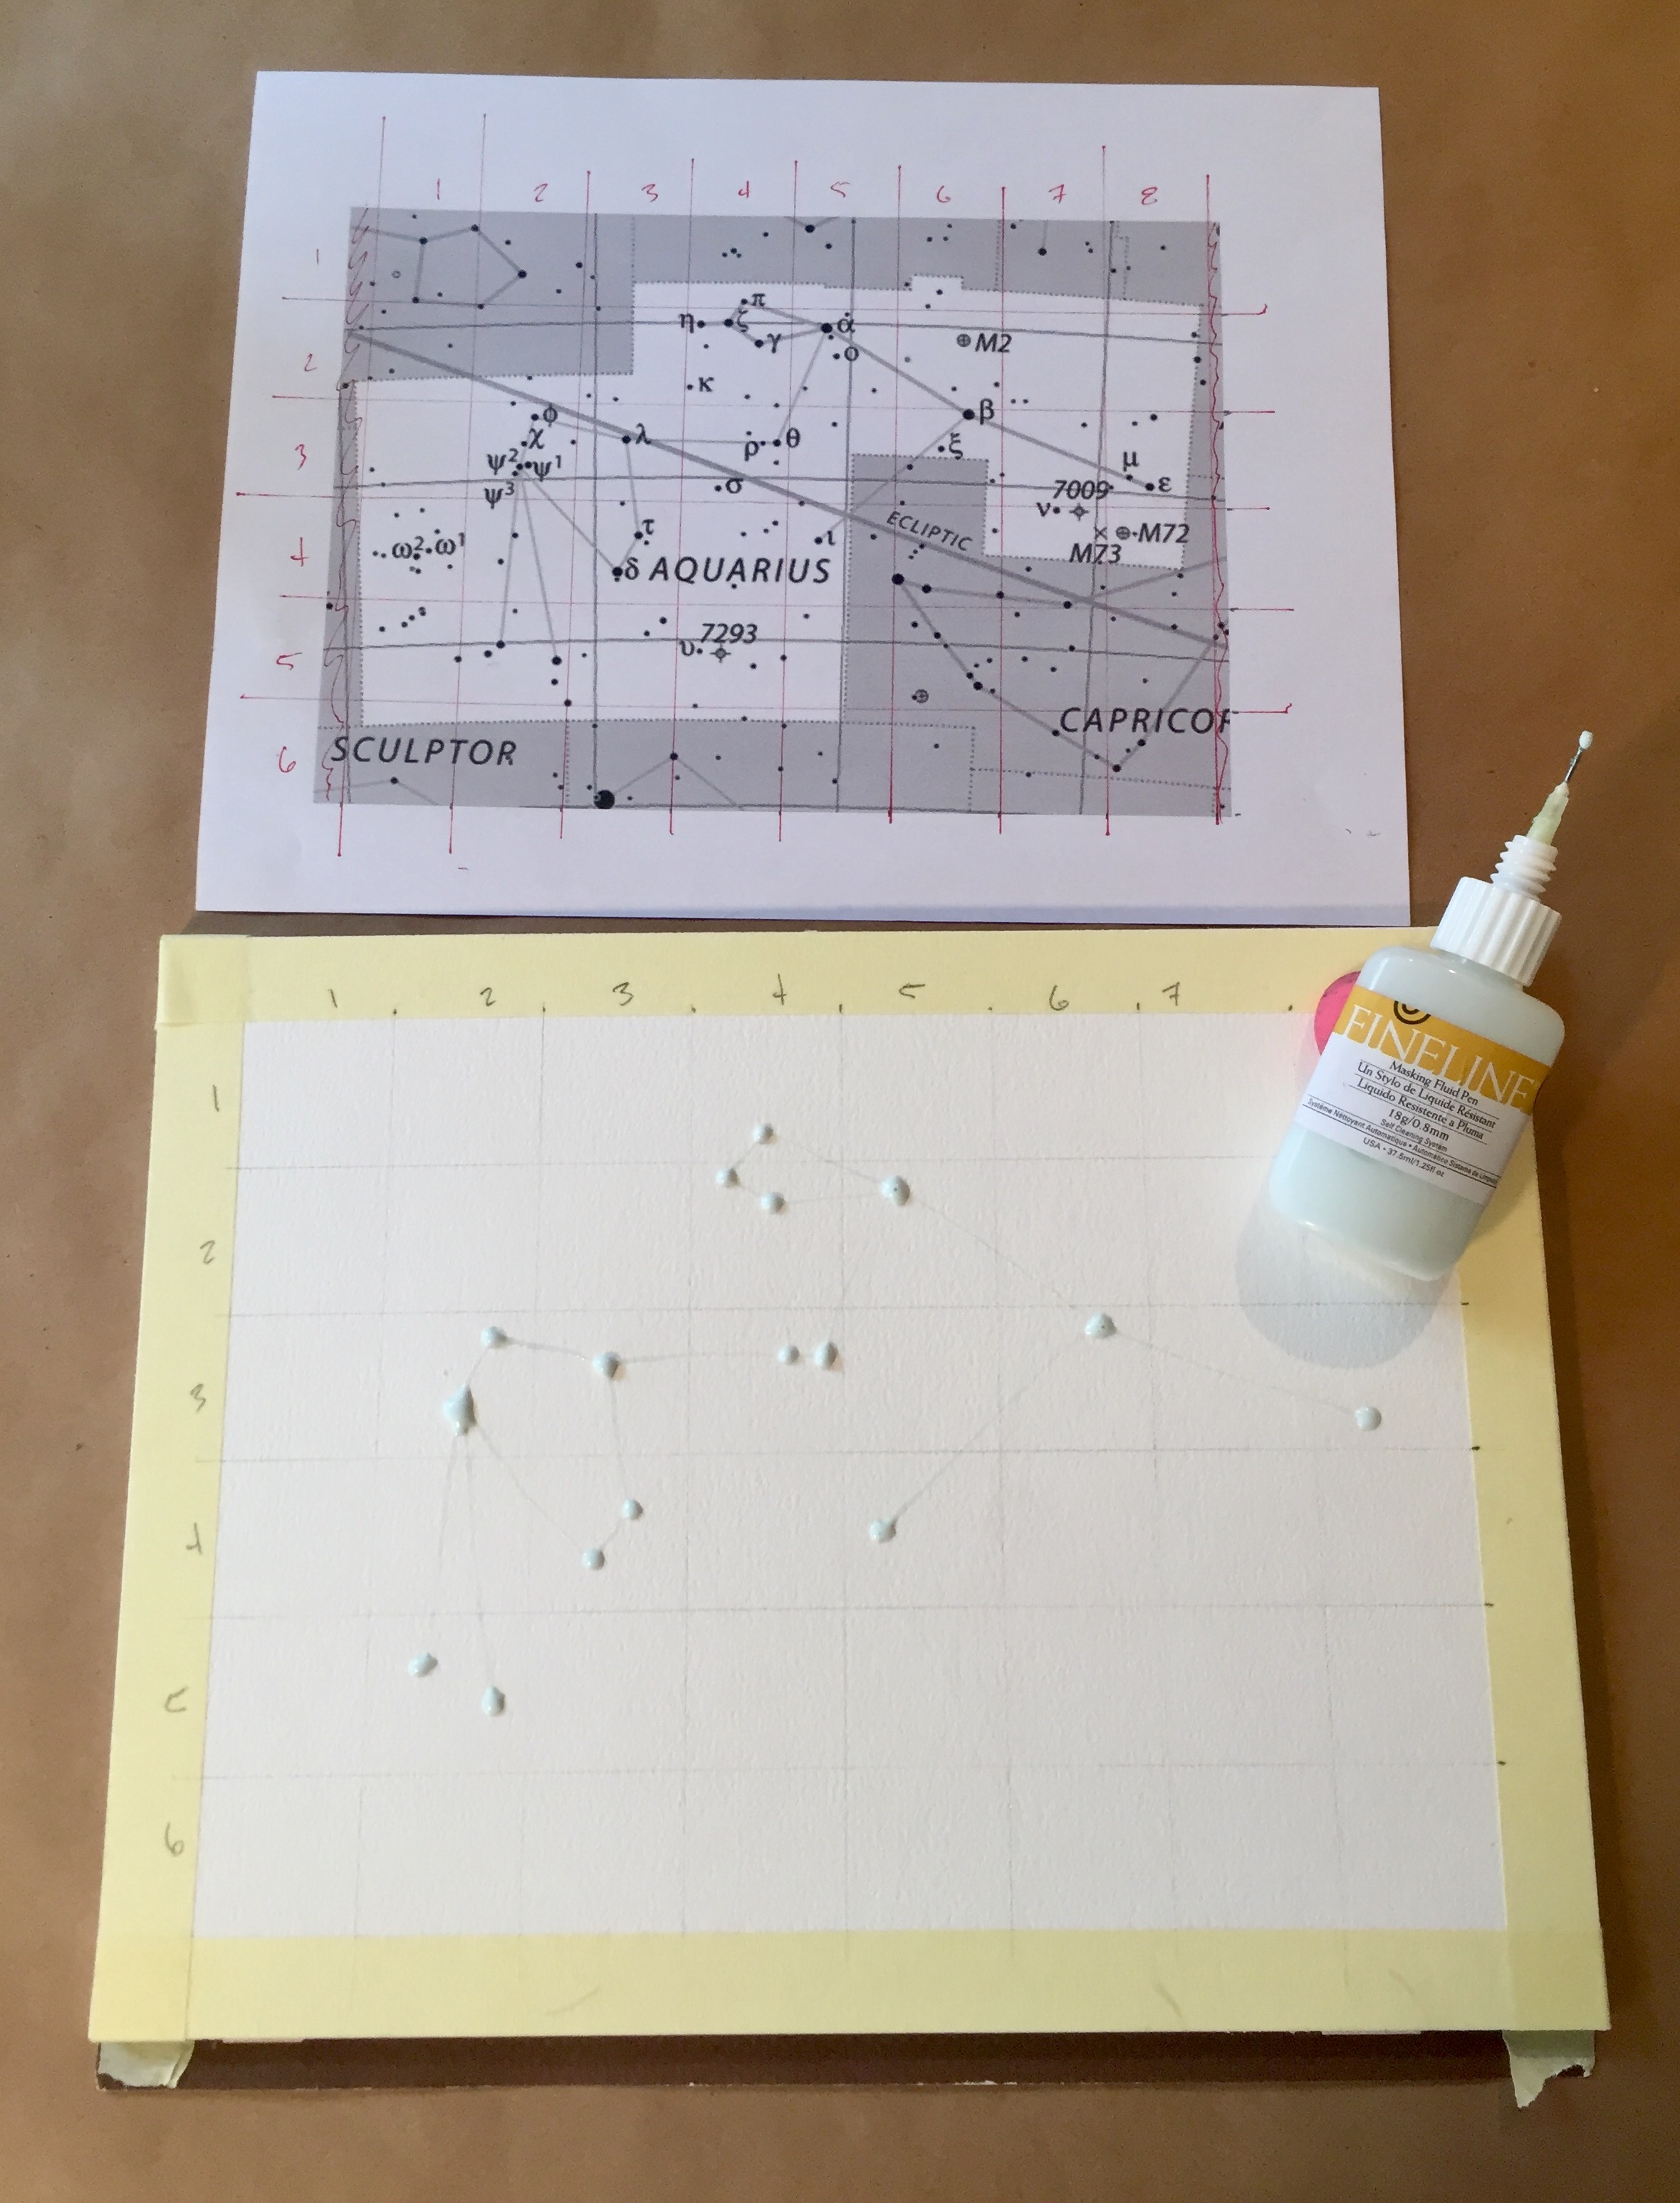
You may want to stop here and dot in a few random stars around the rest of the page.
Or, you may want to be more precise (I mean, you already drew the grid) and refer to your map to dot in the rest of the surrounding stars. For this one, I’m only going to connect the dots/stars of the Aquarius constellation with a thin line of masking fluid so it stands out. I’ll leave the stars within the other constellations unconnected.
Let the fluid dry completely (about 20 minutes).

STEP FOUR:
Brush the paper with a layer of clean water.

Quickly brush/dab on watercolor – play with various blues and a few dabs of red – and watch the colors find each other and bleed together. DON'T OVER THINK IT.
NOTE: Depending on the size of your paper you may need to wet it again – a spray bottle works for bigger projects. Working quickly and keeping the paper wet will ensure you are not left with hard edges.

STEP FIVE:
While the paper is still wet, sprinkle a streak of salt across your ‘Milky Way’. I use mostly fine salt with a few pieces of rock salt.
As the paper dries, the salt will absorb the pigment and leave you with a beautifully abstract and accidental pattern.
Let it dry completely.

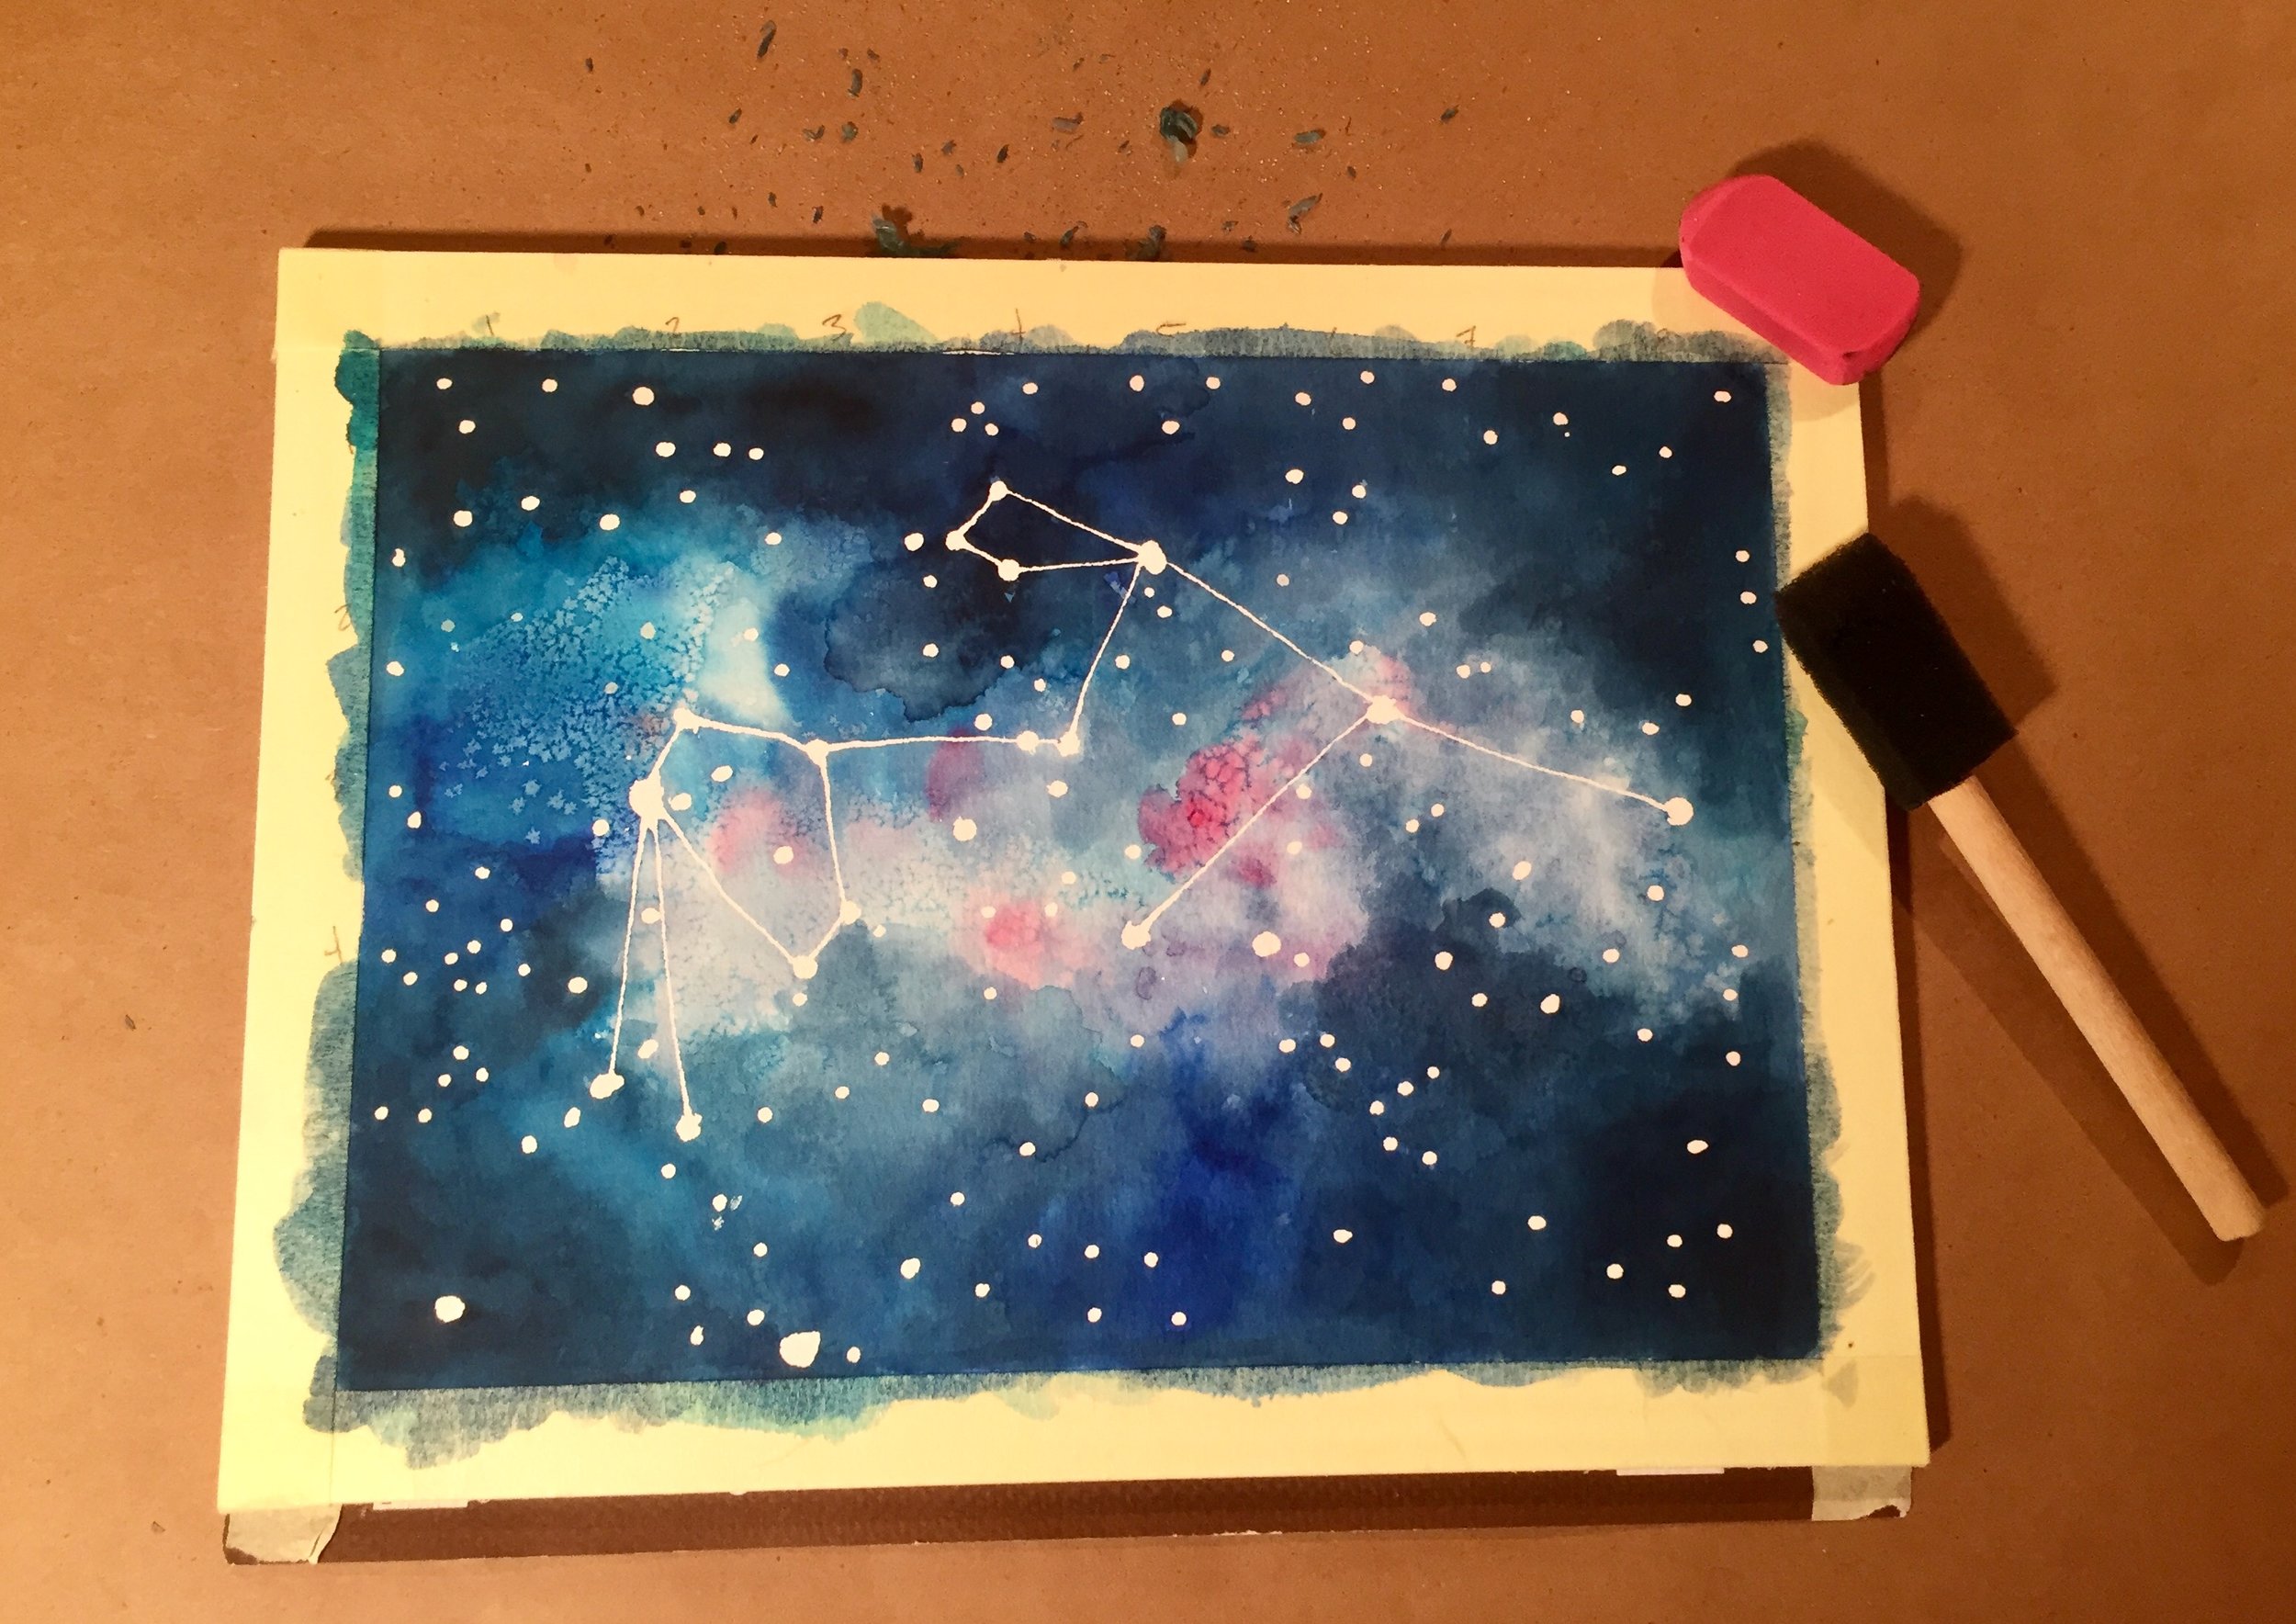
STEP SIX
Brush off the salt carefully so as not to rub off the masking fluid.
Without wetting the paper, paint another layer of blue and purple around the edges to create some darker areas. Use a damp, clean brush to blend the new paint into the background.
Let it dry completely.
NOTE: As an option you can add a little more salt. The effect will be much subtler than on the first layer.

STEP SEVEN
Using your fingers and the dry foam brush, rub off the masking fluid and any remaining salt.
Erase any visible gridlines.
NOTE: Rub your hands over the paper to be sure there isn't any masking fluid remaining. It can be hard to see.
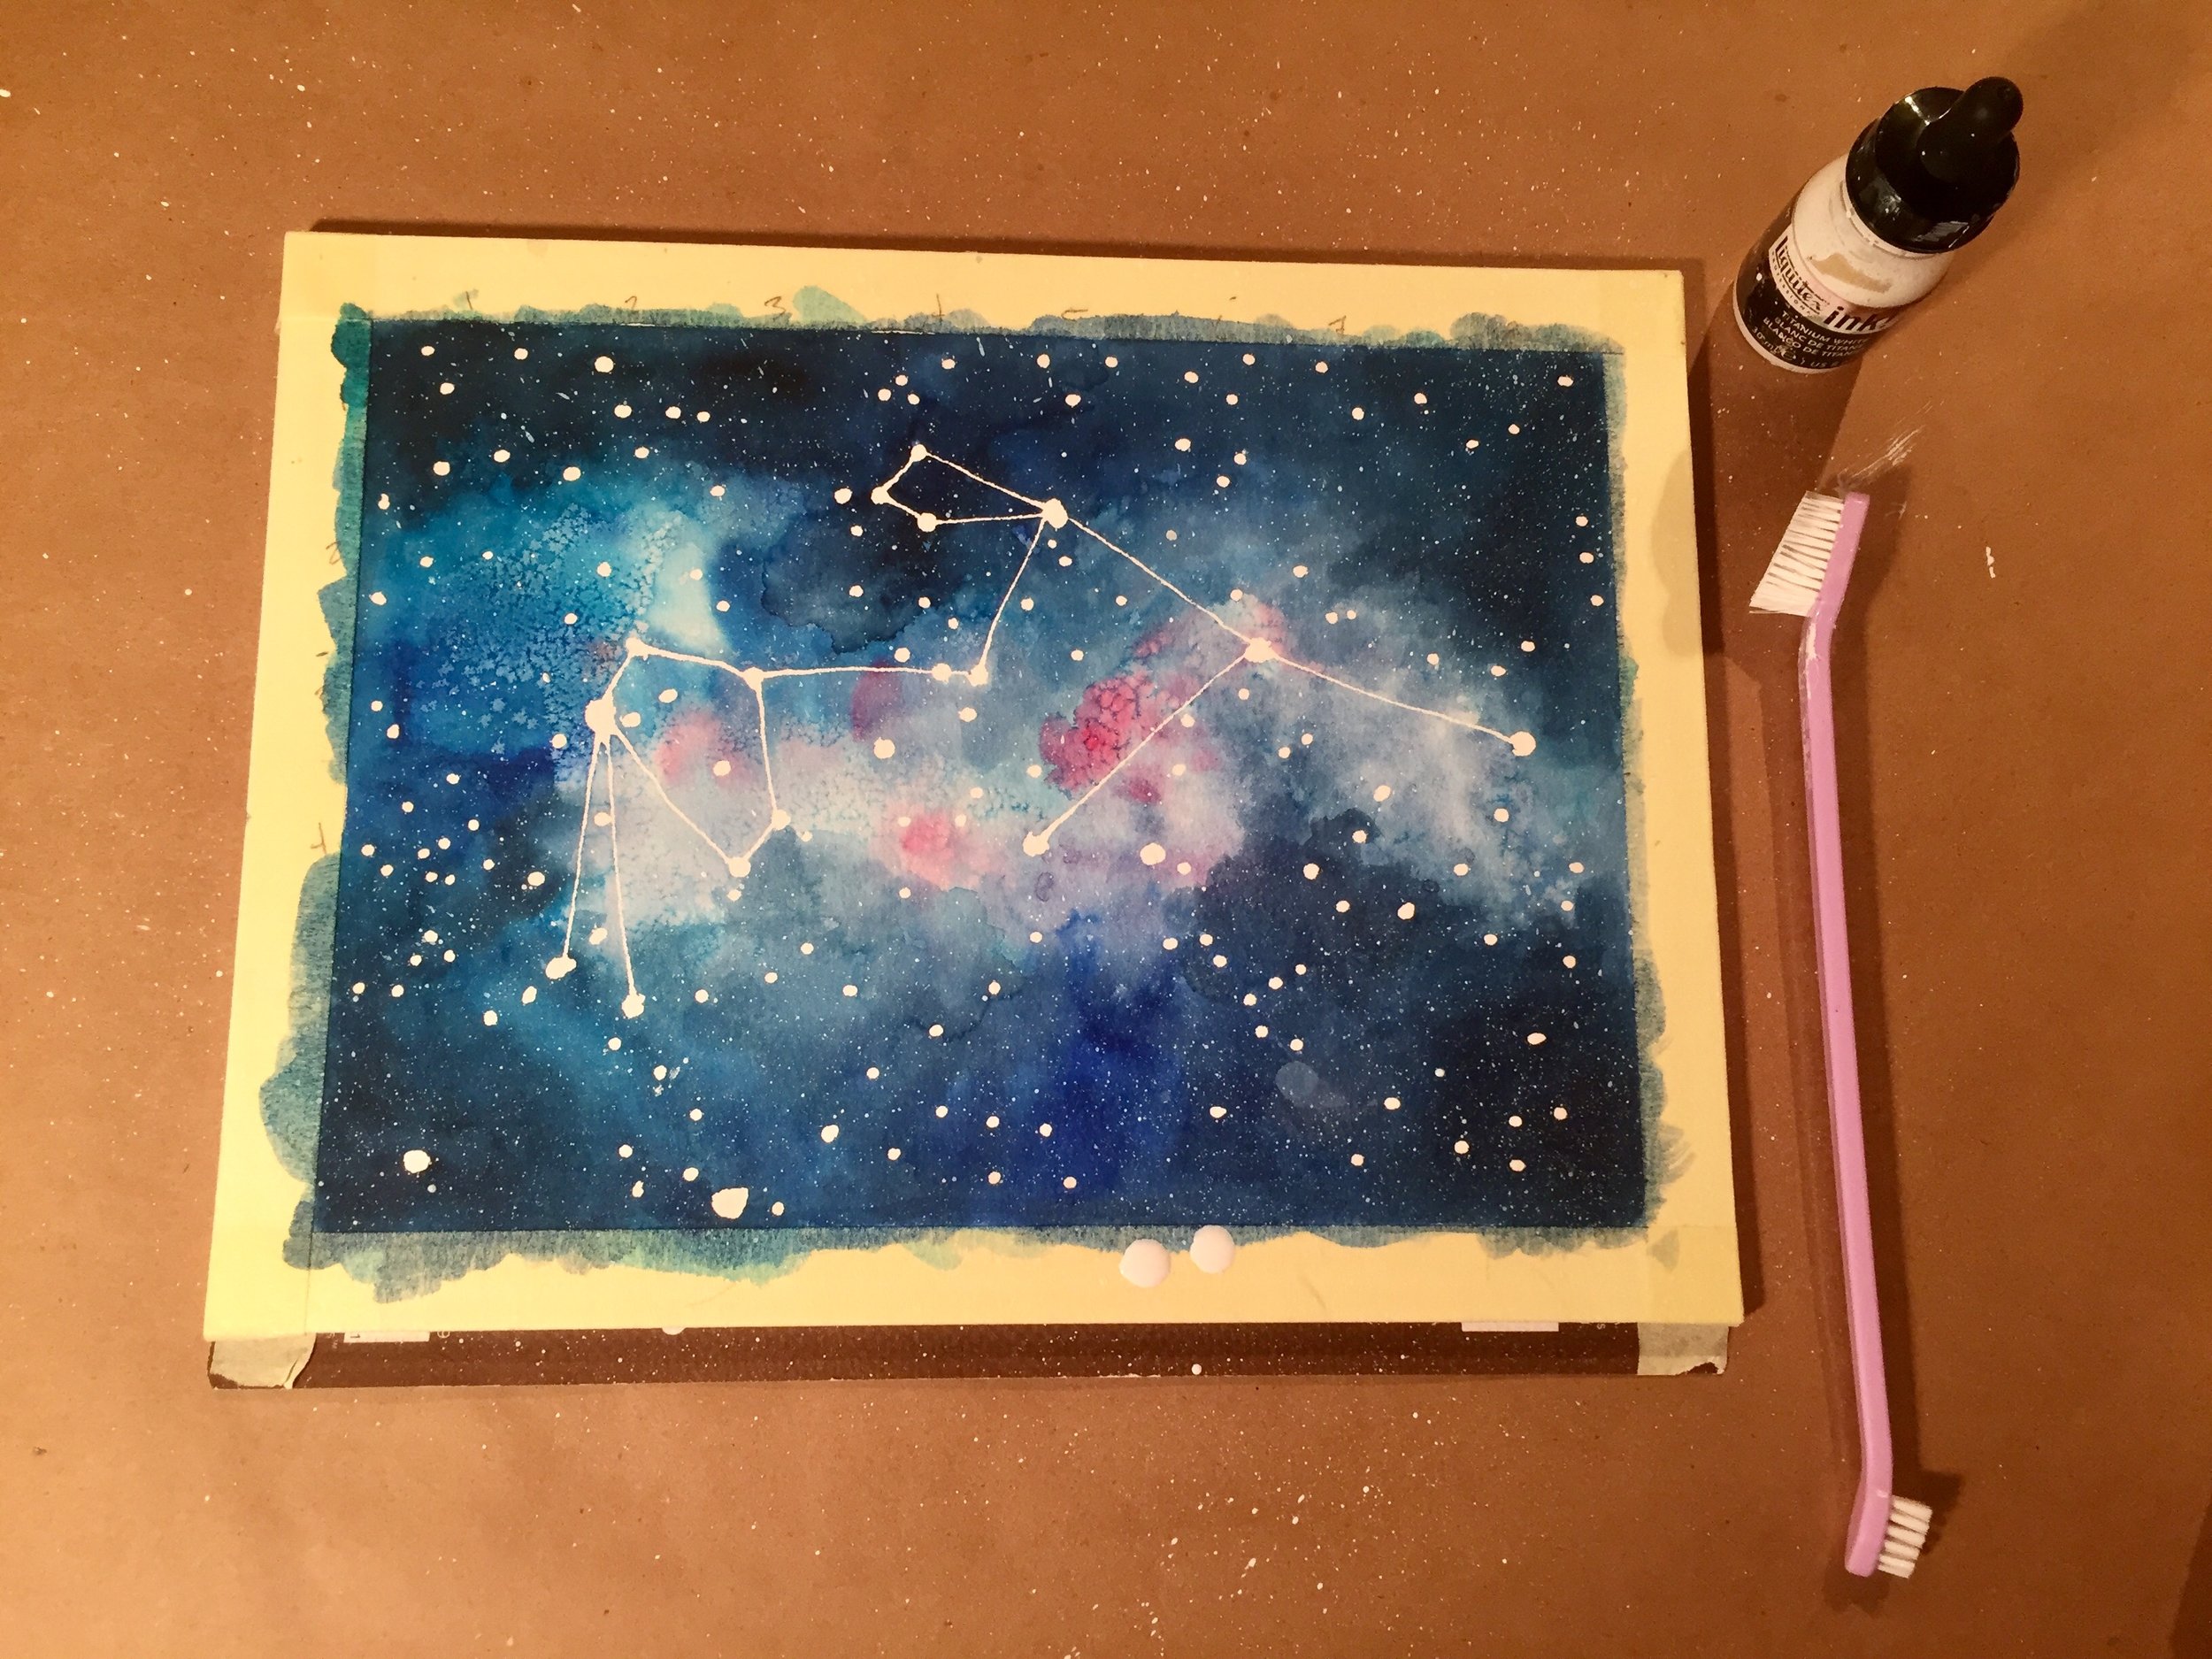
STEP EIGHT
Dip the bristles of the toothbrush into the white ink and, using your thumb, 'spray' the paper with ink.
Let it dry completely.
NOTE: Try not to hold the toothbrush over the paper but just to the side so you don't get any big, globby drips....like I just did. Whoops.

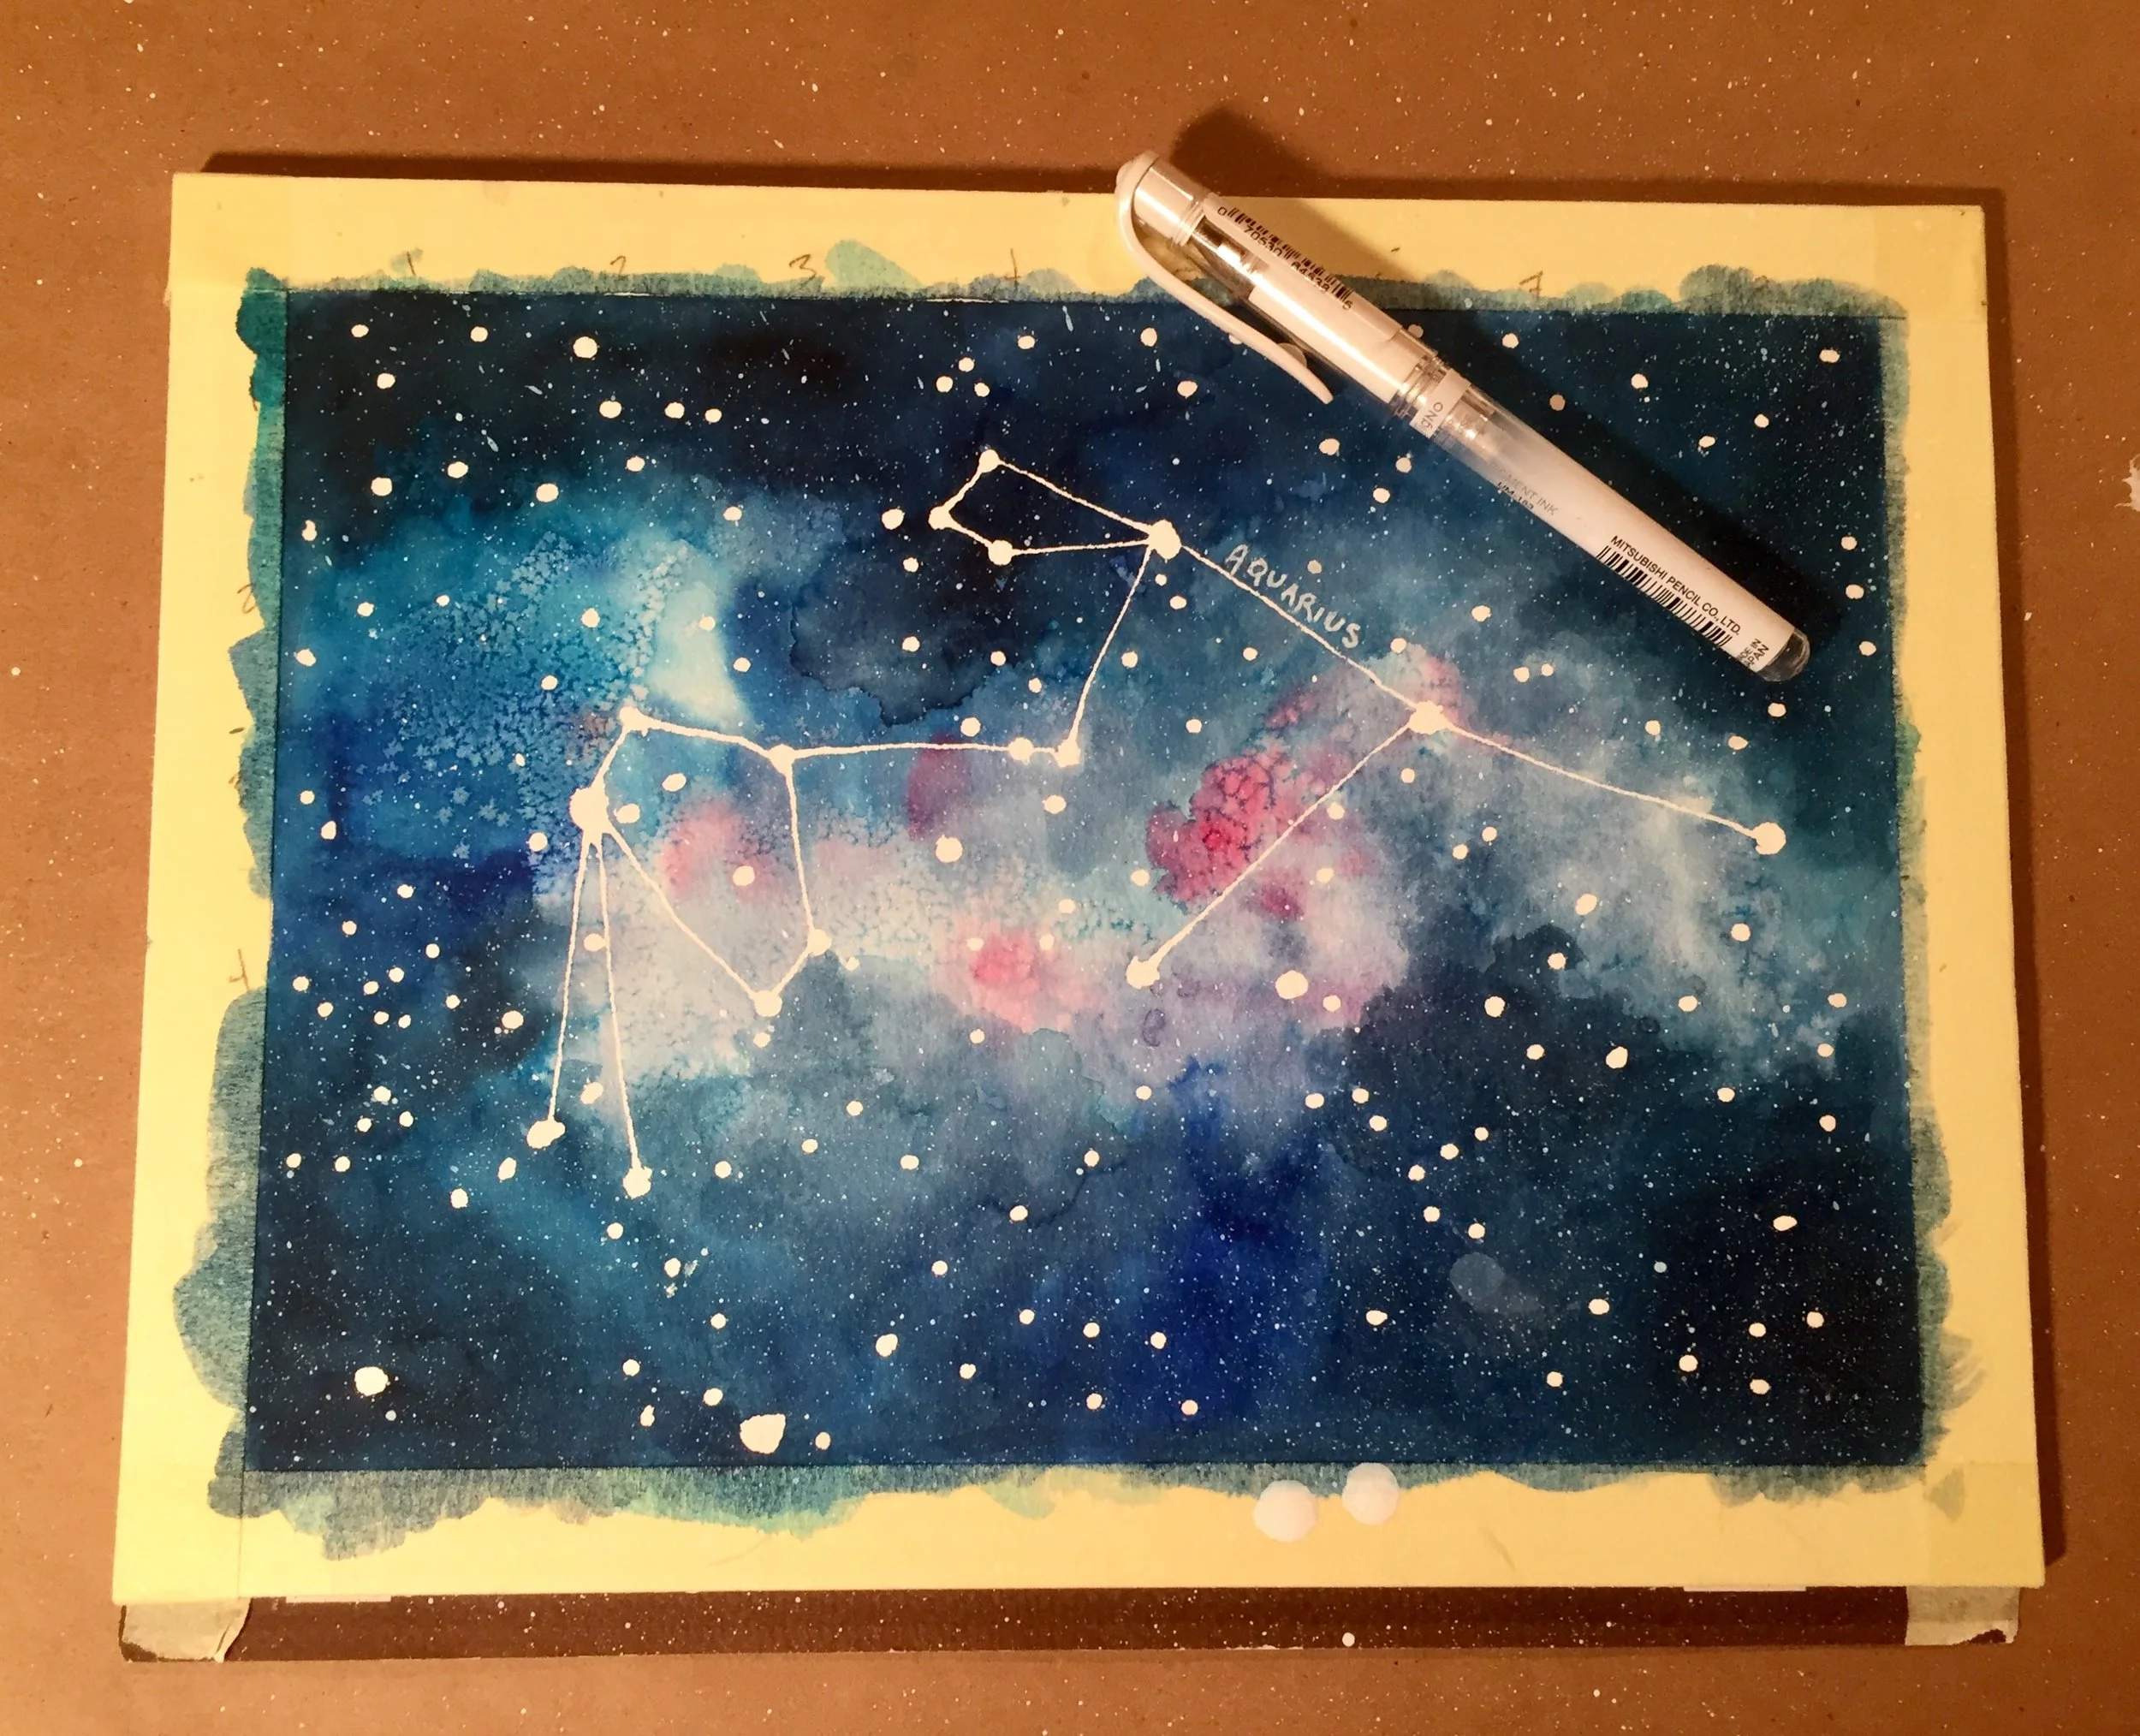
STEP NINE
Using your white ink pen, add the name(s) of the constellation(s).
NOTE: I probably wouldn't do this on something this small, featuring a single constellation, but it is a nice touch on a larger map. I'm going to do it anyway to show you.
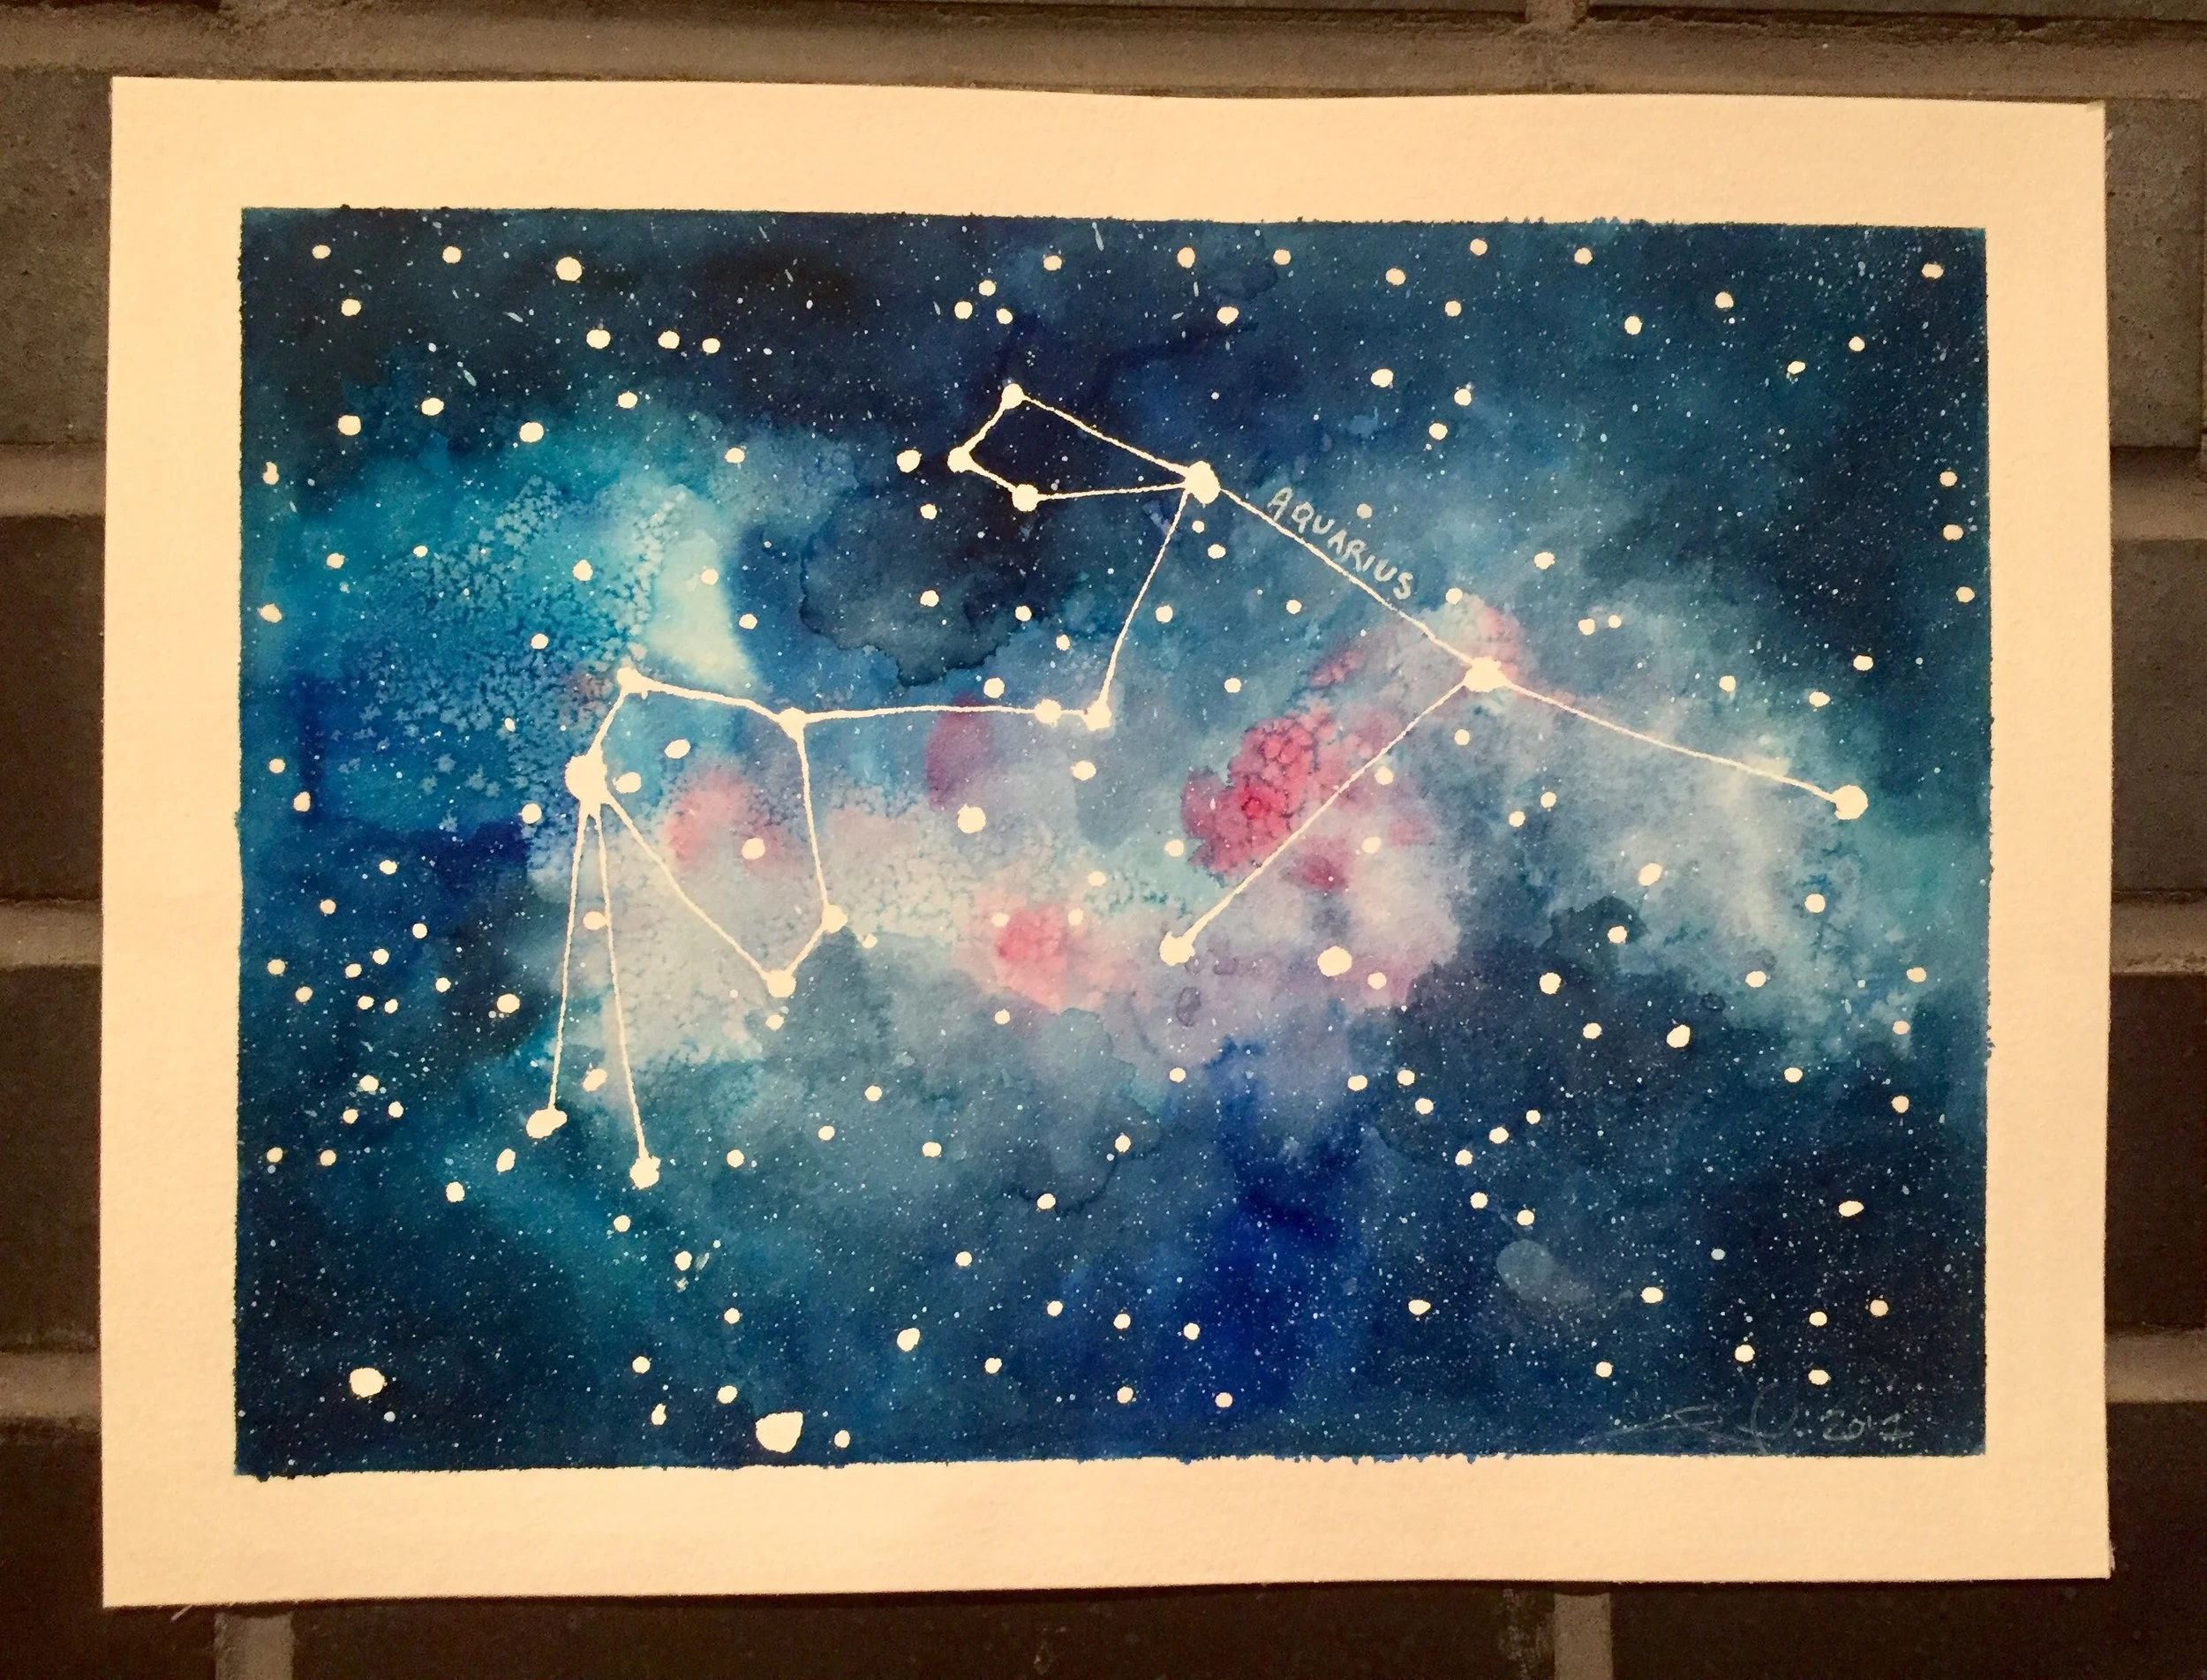
STEP TEN
Remove the tape. Sign it. Hang it up! Brag! Show all your friends! Do a little 'look what I can do' dance!
“Creativity is allowing yourself to make mistakes. Art is knowing which ones to keep.”